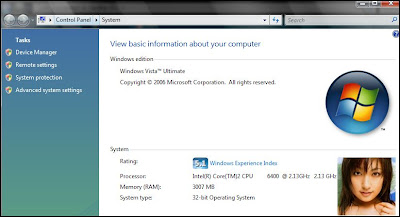
Well, this is just a little Vista trick that involves editing Windows Registry and preparing a BMP file format in a size measured at 120 x 120 pixel.
How to add a logo or portrait to Windows Vista System window?

- Using your favourite image editor to resize or crop the target image (logo or portrait of your dream girl) to 120 x 120 pixels in size and save it as BMP file format.
- Copy / move the 120x120 pixels BMP file to System32 directory, e.g.
move Logo.BMP C:\Windows\System32
(assuming you've saved the BMP file as Logo.BMP) - Open up Windows Registry (i.e. click the Vista Orb button, type regedit.exe in the Start Search textbox, click the regedit.exe shortcut listed in the Program list)
- Browse to this Registry key path:
HKEY_LOCAL_MACHINE\SOFTWARE\Microsoft\Windows\CurrentVersion\OEMInformation
- While at the OEMInformation Registry key, right-click on the right-pane, select New then String Value and name it as logo
- Double-click the logo Registry and enter the full path of BMP file in System32, i.e. C:\Windows\System32\Logo.BMP
* If you want to add manufacturer information to Windows Vista System window;
- Browse to Register key path:
HKEY_LOCAL_MACHINE\SOFTWARE\Microsoft\Windows\CurrentVersion\OEMInformation
- At the OEMInformation Registry key, right-click on the right-pane, select New then String Value and name it as Manufacturer
- Double-click the Manfacturer Registry and enter the manufacturer information, i.e. IBM, Sony, HP, or yourname.
No comments:
Post a Comment